Again there was nothing too complicated or difficult about these elements of the build.
Front Anti-rollbar: The blue elastic bushings need to be inserted into their brackets and then this sub-assembly is slid onto the anti-rollbar (ARB) itself (silicone lubricant spray helps a lot).
The anti-rollbar boots need to go on next and I pushed all the parts to the centre of the ARB so that they would be out of the way and not damage the paintwork whilst we were manouevering everything into place.
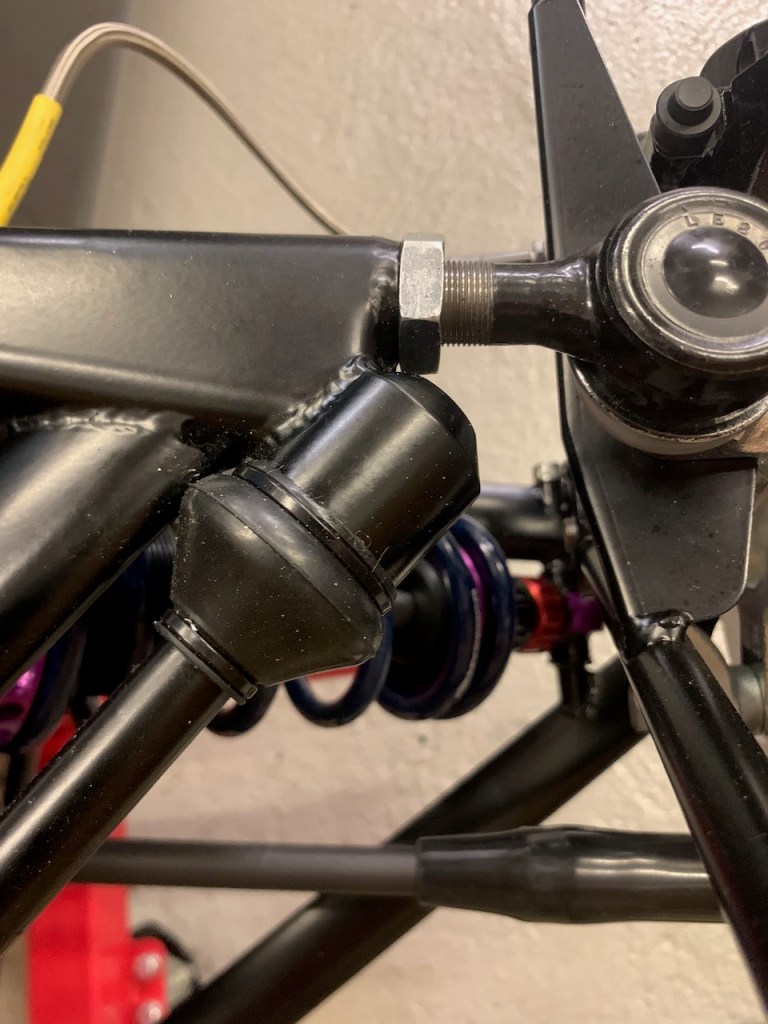
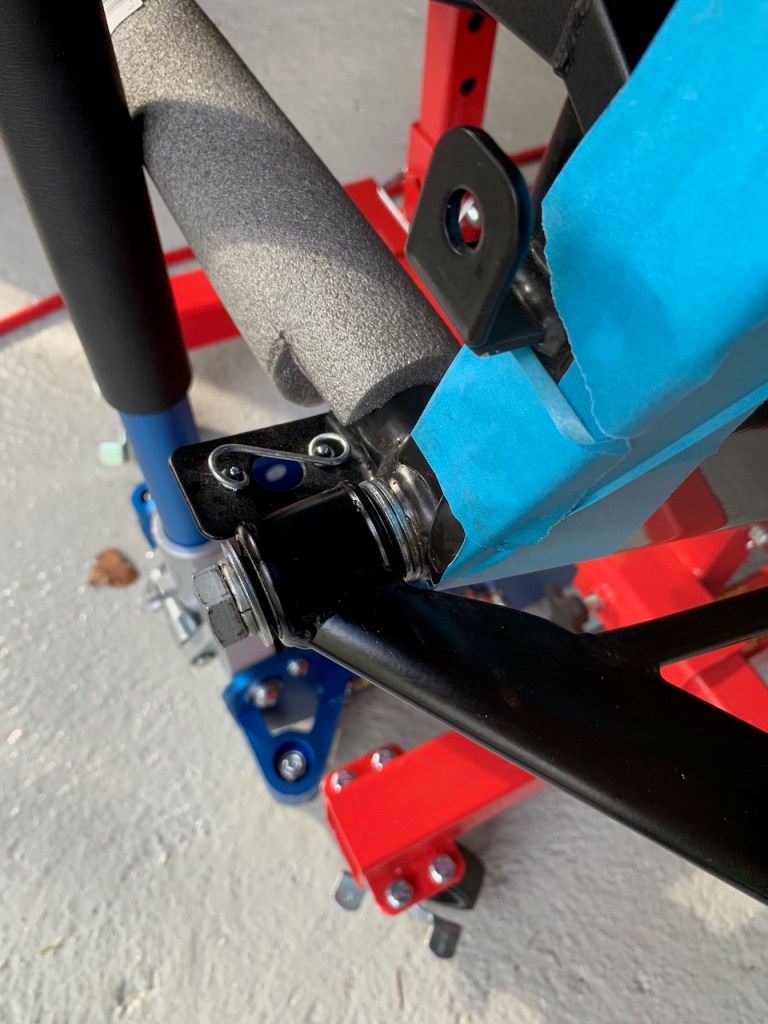
The plastic balls needed a small amount of de-burring with 400 grade wet and dry in order to fit into the wishbone cups. After that is was simply a case of putting a small amount of grease into the cups, inserting one end of the anti-rollbar into its cup and then doing the same with the other (the bar is quite springy and this required a lot less effort than I thought). With the anti-rollbar fitted all that was left to do was to move the bushings/brackets into position and bolt them in place. The final task is to put a liberal amount of grease over the ball/cup and then slide the boot into place. The boot sits in a groove on the wishbone cup and is held in place with two cable ties.
Front ARB boot fitted and cable-tied in place
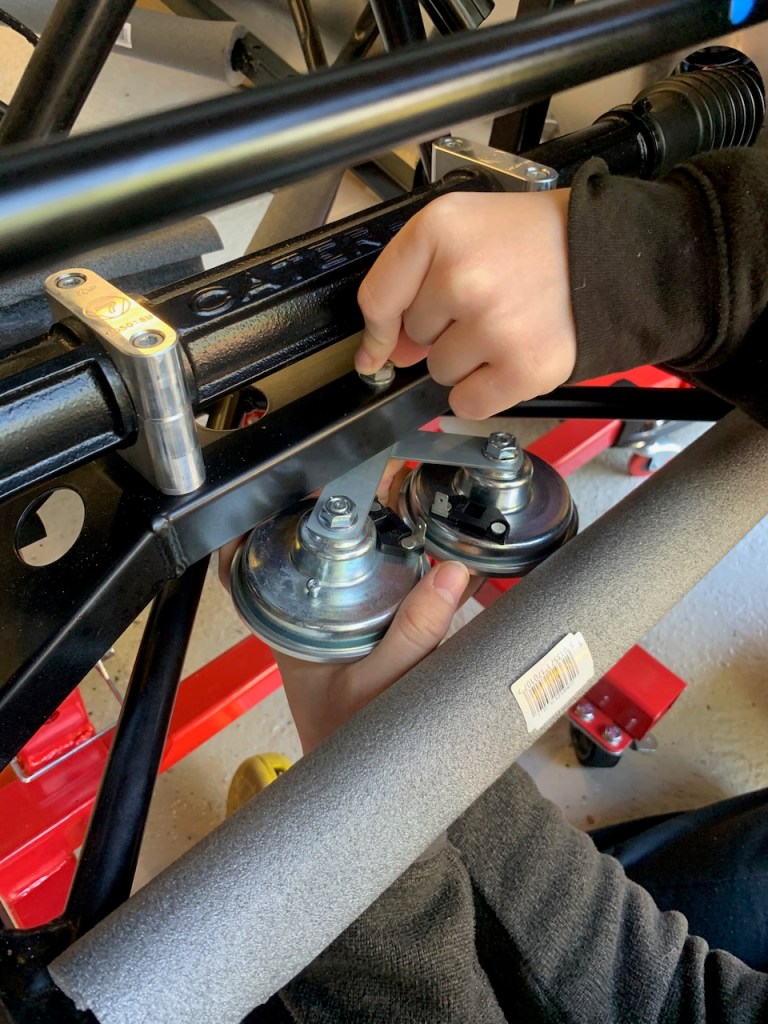
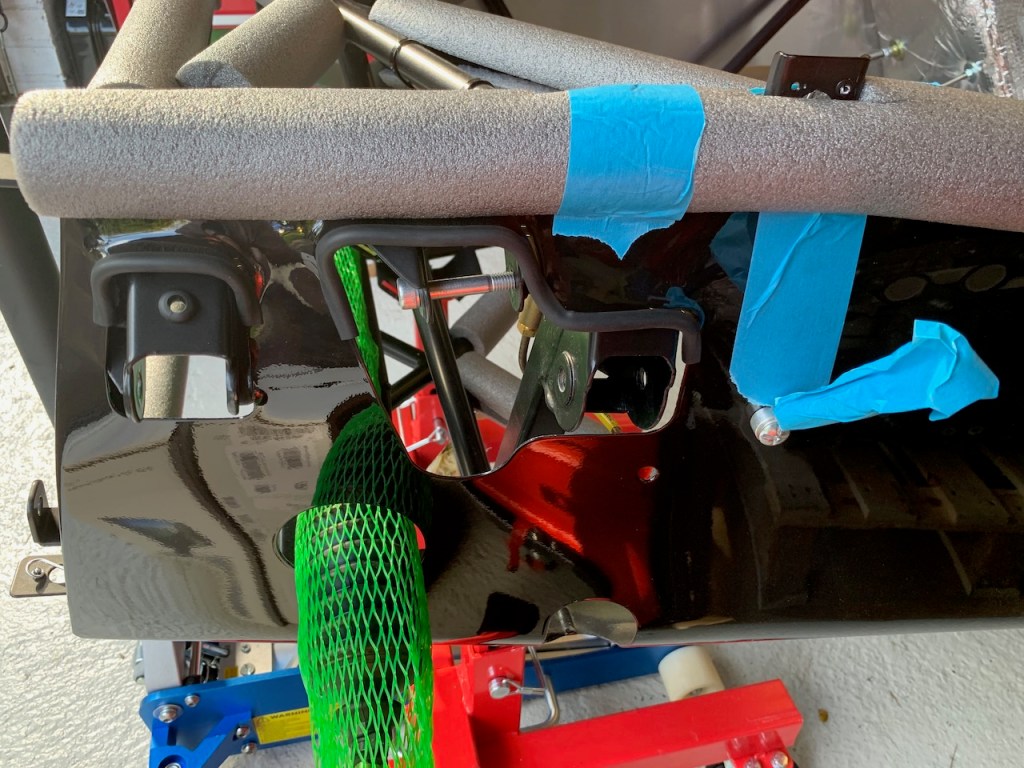
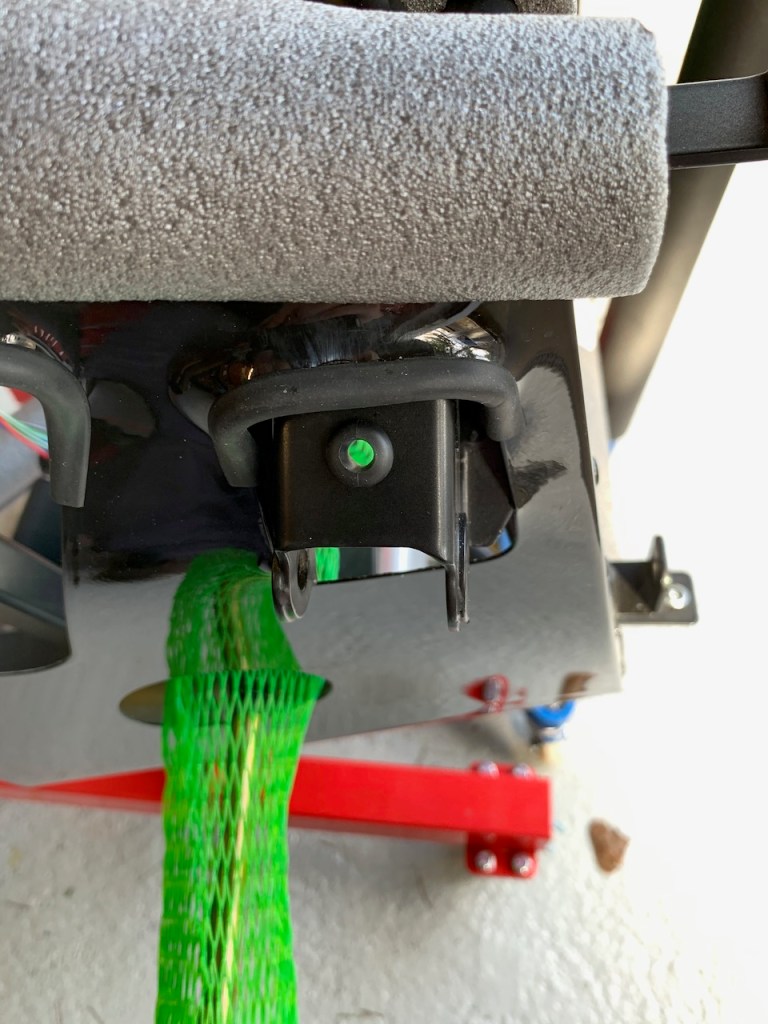
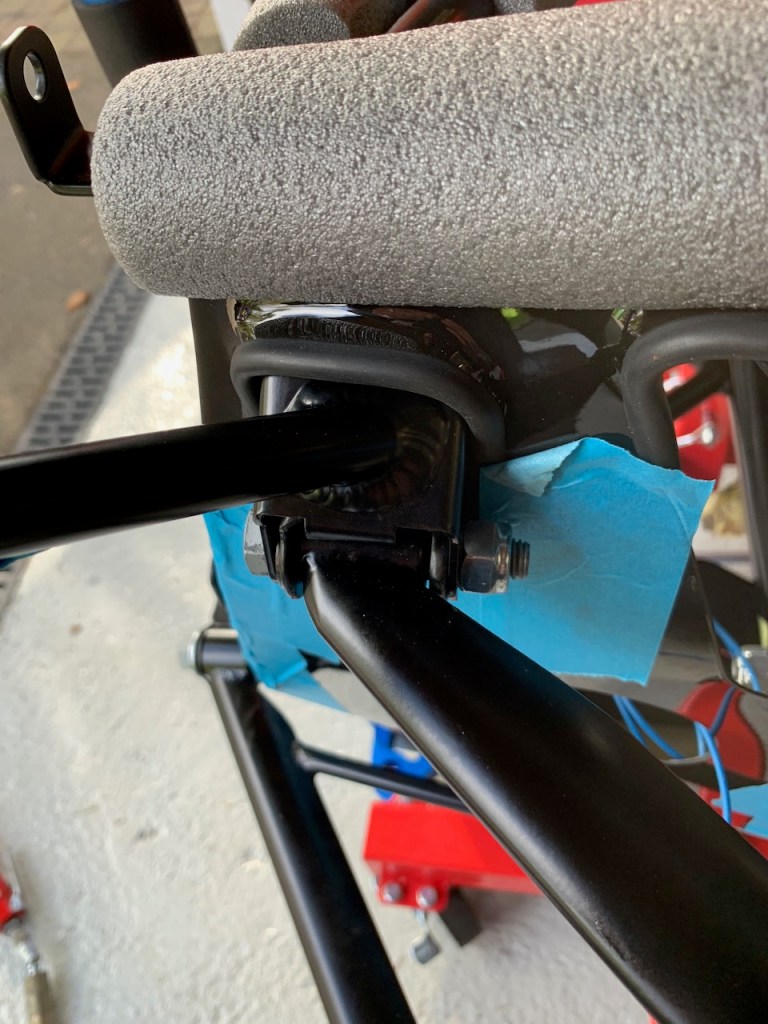
Horns: The horns on a 420R need to be suspended below the steering rack mount and I drilled an 8mm hole in the mount using a step drill as this gives a much cleaner hole.
The horns are identical and all that needs to be done is the loosen one of the mounting brackets and rotate it so that when both are fitted the spade connectors are close together. The horns are fitted using a long bolt and spacer.
Cycle wing-stays: I do not have many pictures of this part of the build but the cycle wing stays are pretty simple to fit, the lower part fits on the back of the stub axle and the top part fits under the top wishbone mount. The only difficulty is that access to the wishbone nut is a little tight.
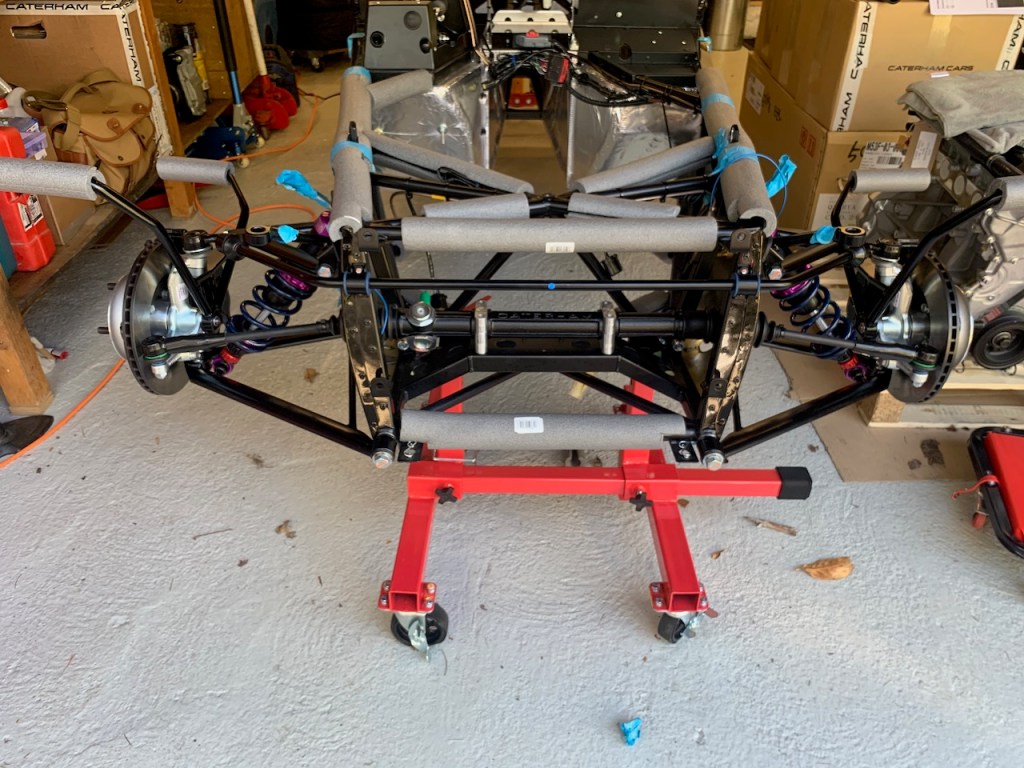
Seven’s are basically assembled from front to back so the first part of this build was to put the front suspension together starting with the front wishbones.
The wishbones are handed so we started with the right hand side. The first job was to find the nuts, bolts and large chamfered washers in the fittings pack. After that we applied copper grease to the bolts and checked they fit in the chassis.
The next step is to fit the chamfered washers. The chamfered washers control the castor and the recommended sequence is to fit 2 either side of the front lower wishbone bushing and 2 between the rear lower wishbone bushing and the chassis mount (ie 2-2-2).
The washers are a really tight fit and needed some persuasion to locate them before the bolt would pass through. The best technique seemed to be to apply plenty of copper grease and use a dead blow hammer to gently tap the washers into place whilst using a pin punch to hold the wishbone in place.
IVA trim is needed around the flared edges of the aluminium skin
Front wishbone mount spacers
Rear wishbone mount spacers
Both sets of wishbones fitted, steering rack up next
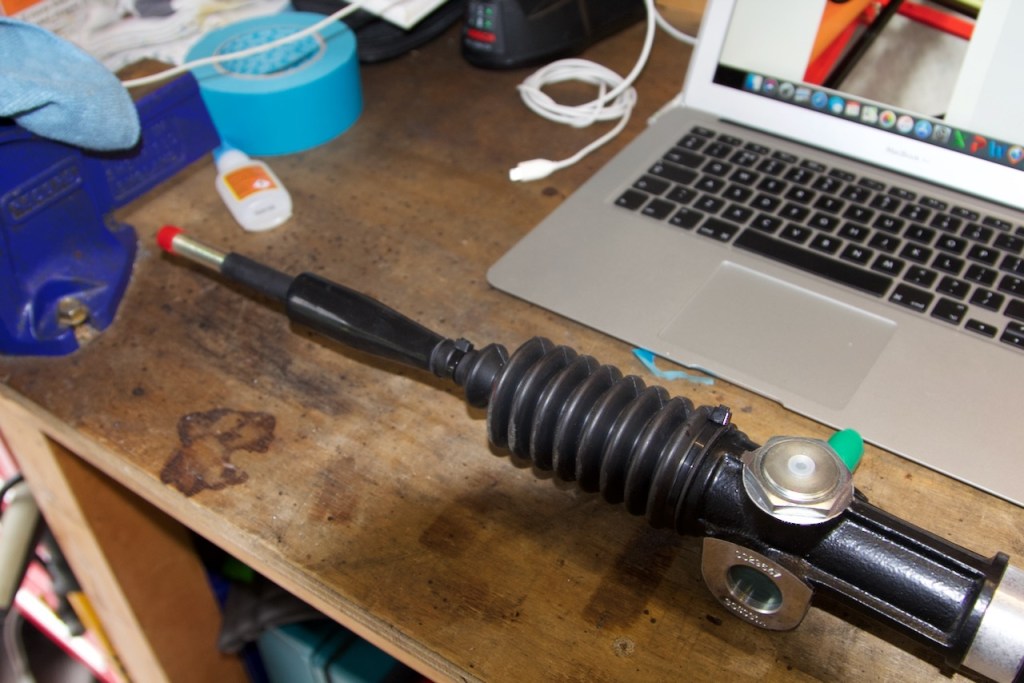
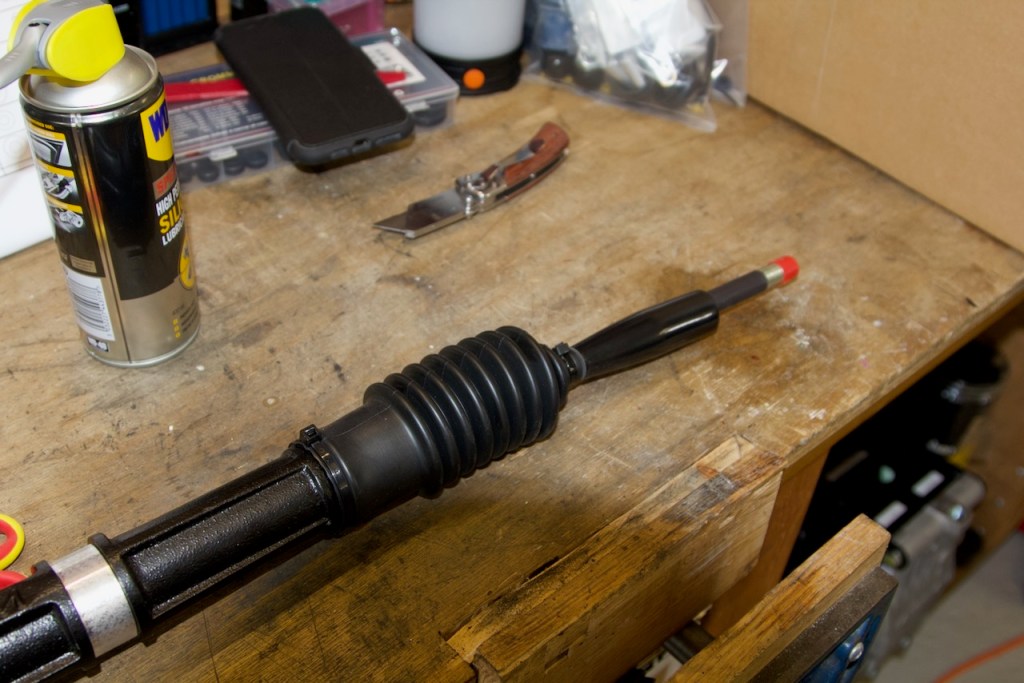
The steering rack is relatively easy to install but requires track rod end covers to be fitted before joining to the steering arm. I also decided to protect the exposed steering rod with some heat shrink tubing. This is covered by the gaitor at one end and the track rod cover at the other.
Fitting heat-shrink to protect the exposed metal
Track rod end sleeve / protector fitted
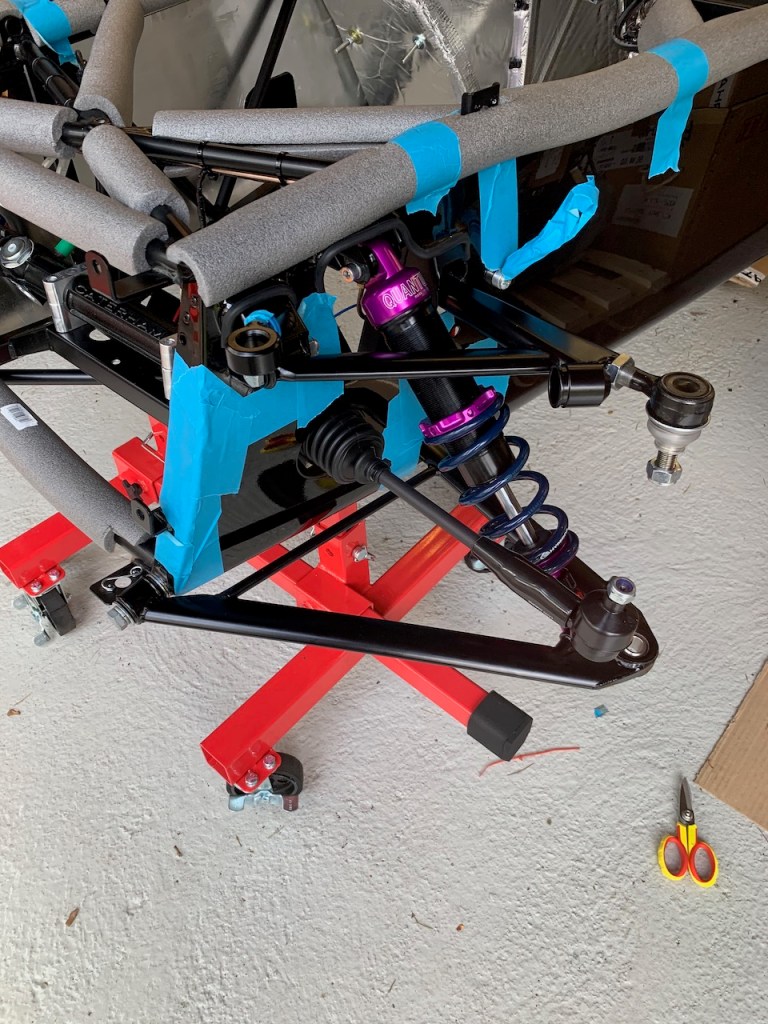
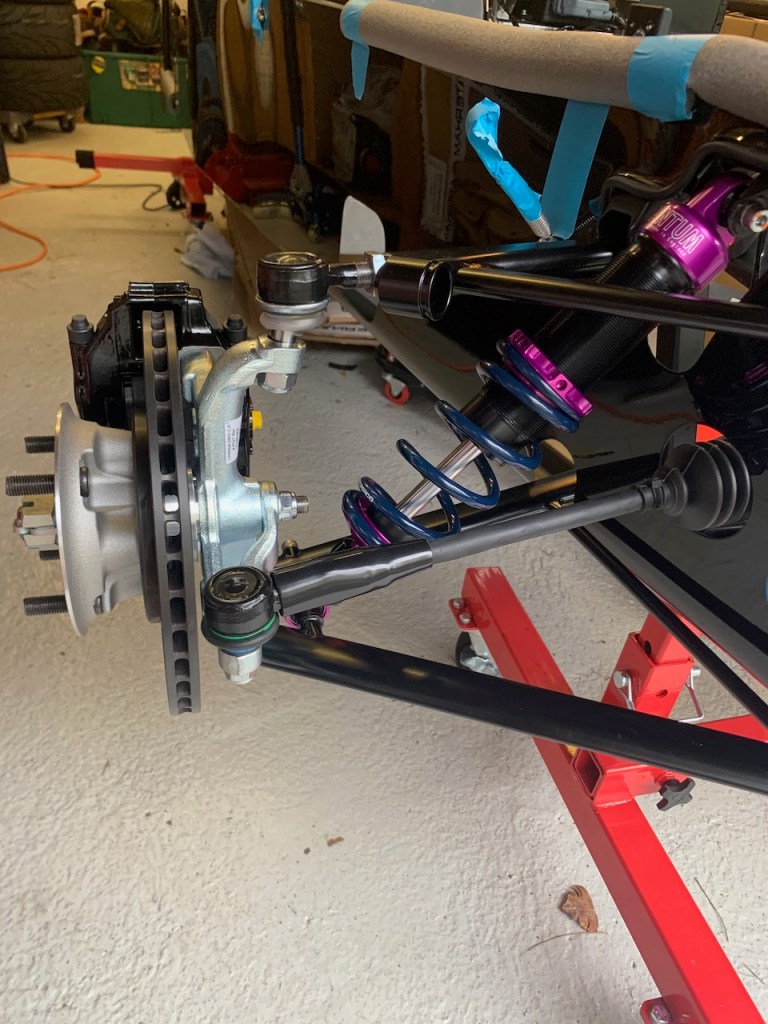
Steering rack and Quantum shock fitted
I also fitted a rubber grommet to the chassis mount as the headlight and indicator cables will exit from the underside of the chassis mount and need to be routed to the loom connection. I also passed a guide wire through each headlight mount – not sure it is necessary but it may come in handy later.
Rubber grommet
The headlight mounts are fitted to the front wishbone mount and required the ‘hook’ on the underside to be opened up a little to allow the front wishbone bolt to pass through.
Headlight mount fitted to front wishbone mount
The uprights are easy to install but the 4-pot callipers need a top-hat bush and ring spacer inserted into the lower wishbone mount.
Upright fitted
The top upright nut will be tightened when the cycle wingstays are fitted so I just loosely fitted the Nyloc nut at this stage.
Upright assembly – pre cyclestay fitting
The lower wishbone bolt needs a half height nut otherwise the nyloc will not engage properly (the IVA inspector needs to see 1 or 2 threads protruding from the nut).
Incorrect full size nut
Correct half height nut
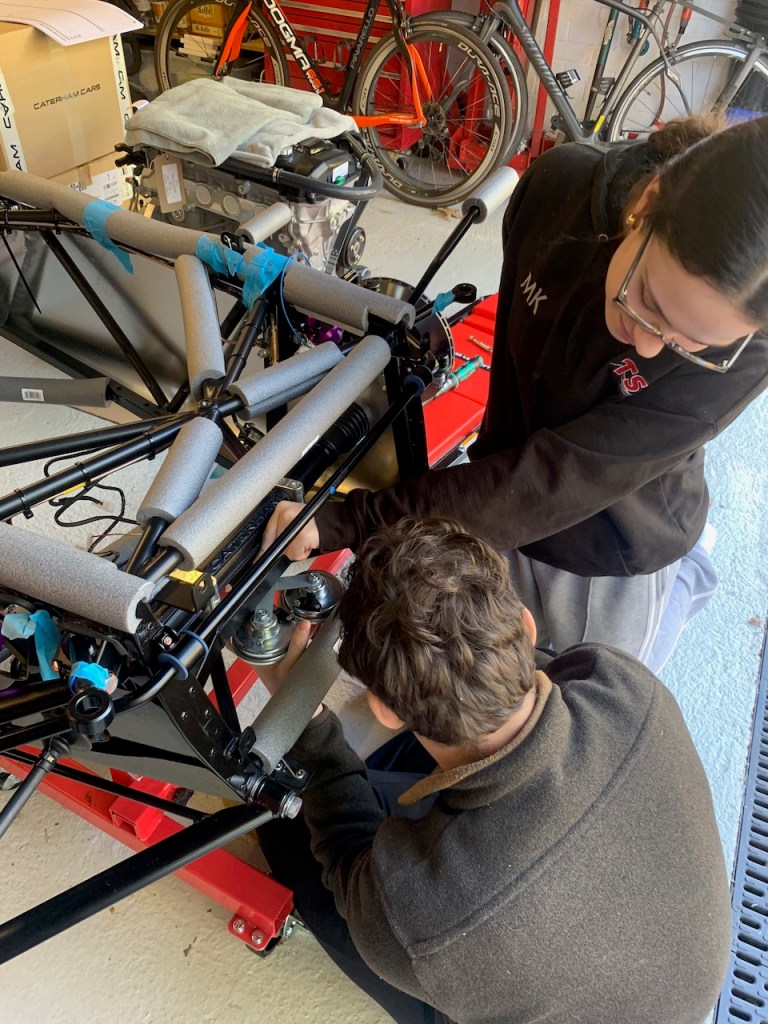
The next part of the build is to fit the anti-rollbar, horns and cycle wingstays.
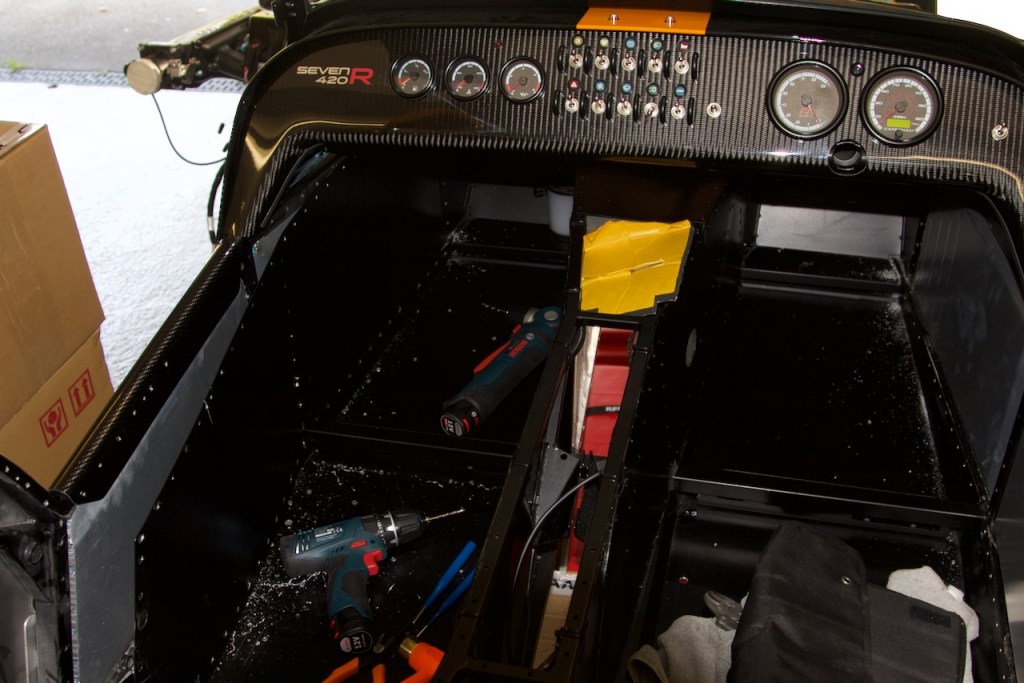
The first job of the build is actually to remove parts rather than add them, namely the interior aluminium panels.
There are 5 panels in total to remove: the rear bulkhead, 2x bow-tube panels and 2 x footwell panels. The rear & bow tube panels are held in with aluminium rivets and the footwell panels use stainless steel rivets along the bottom edge and aluminium along the top edge. The stainless steel rivets also serve to fasten the lowered floor pans to the lower chassis tube.
I’ve obtained black aluminium and black stainless rivets for the replacement carbon panels.
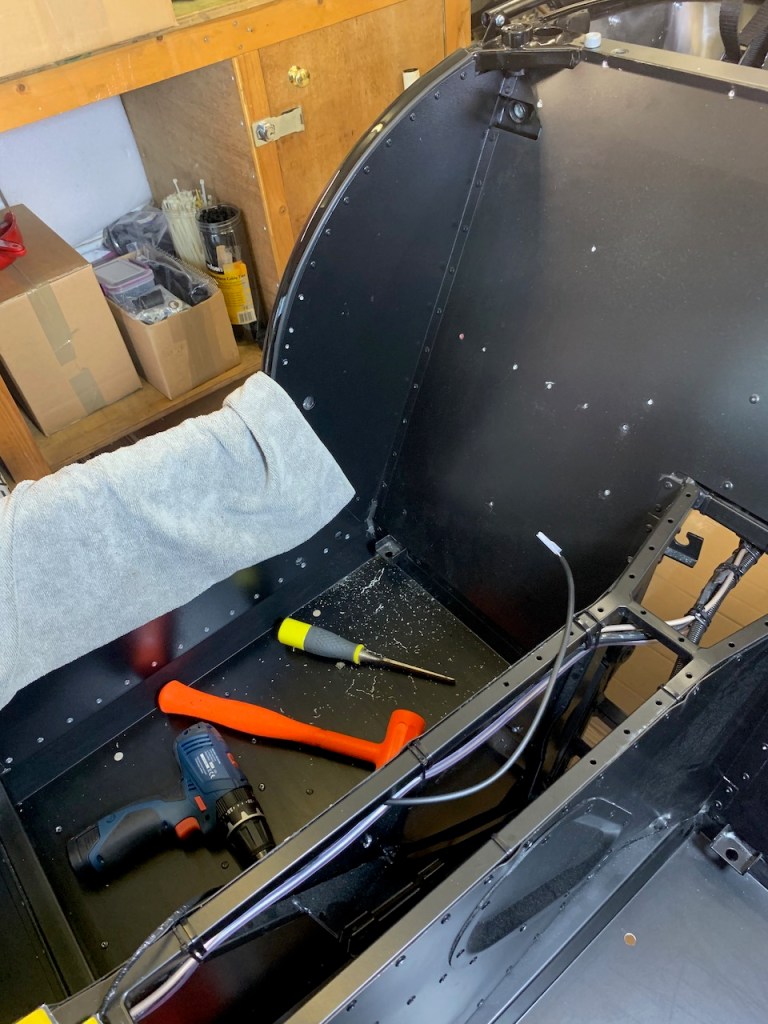
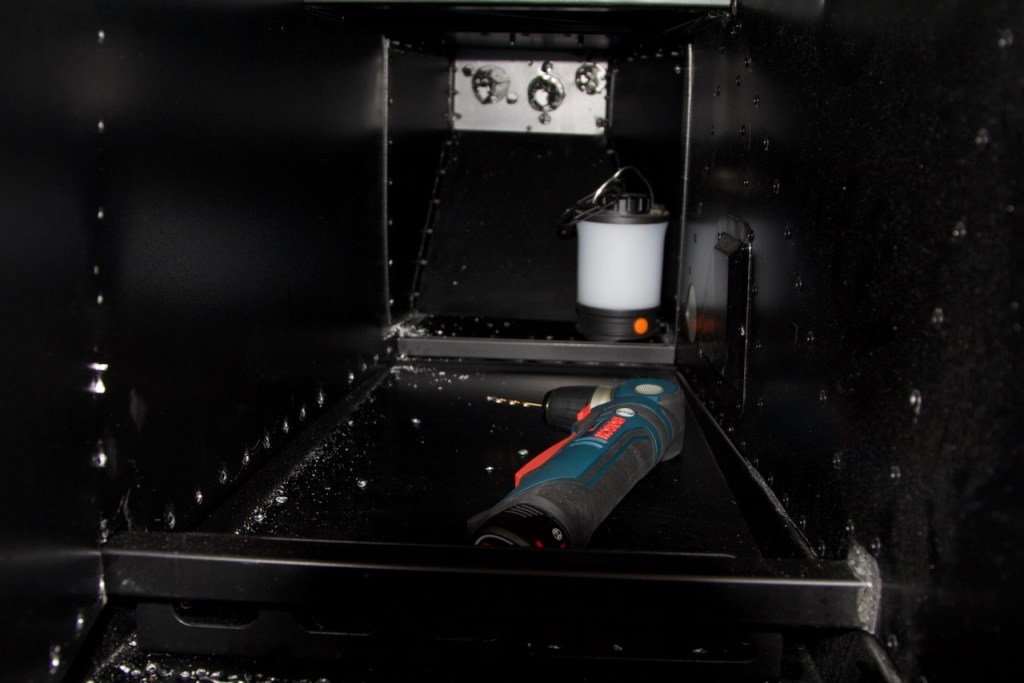
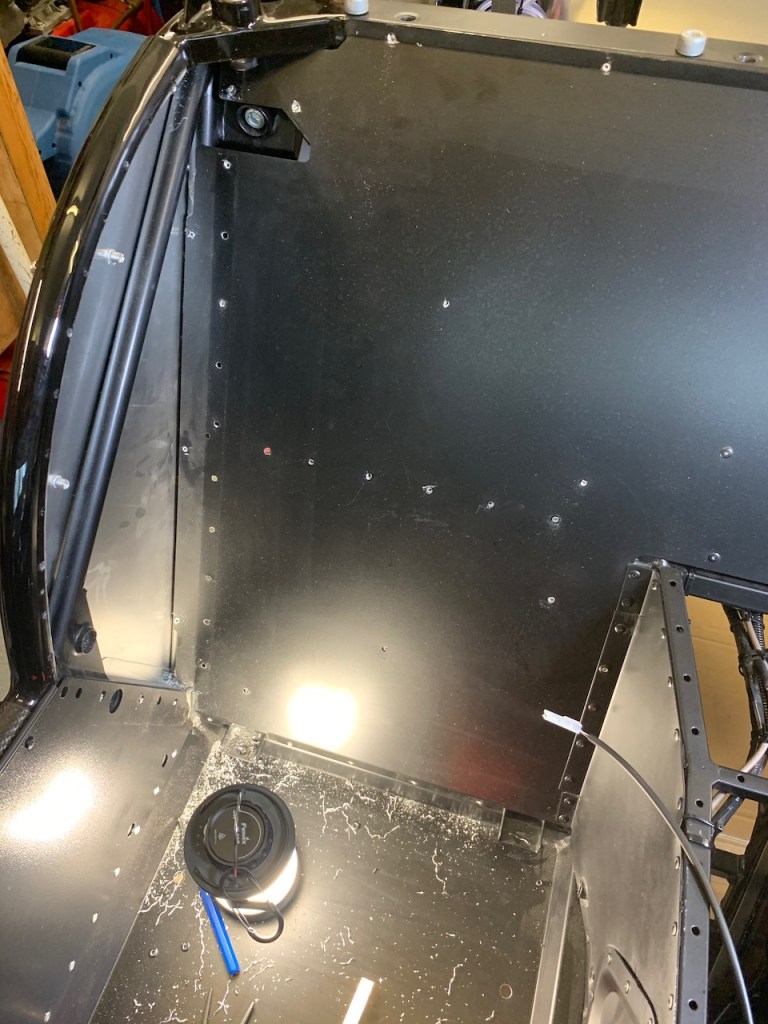
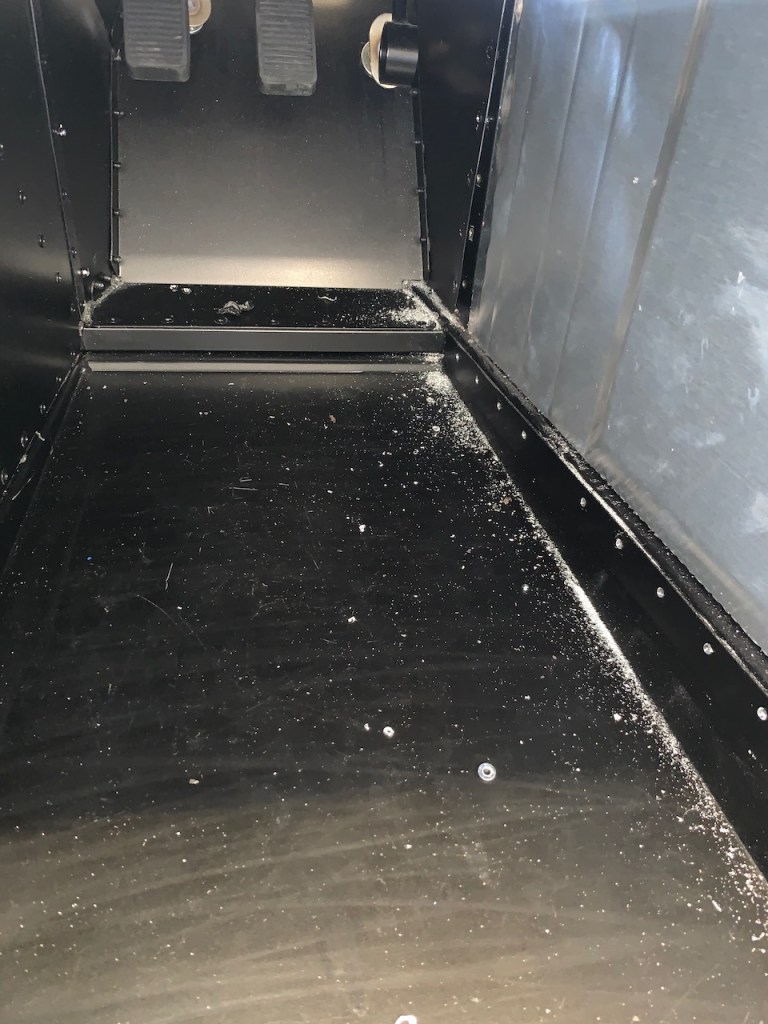
Removing the old panels is relatively easy for the most part, just drilling out the centres and then tapping off the rivet head with an old chisel. The most difficult parts are in the footwells simply because access is so restricted. A cordless angle drill and camping lantern proved very helpful during this part.
Once the rivets are out of the way the panels can be removed. This involves a little bit of flexing and twisting of each panel but is not too difficult.
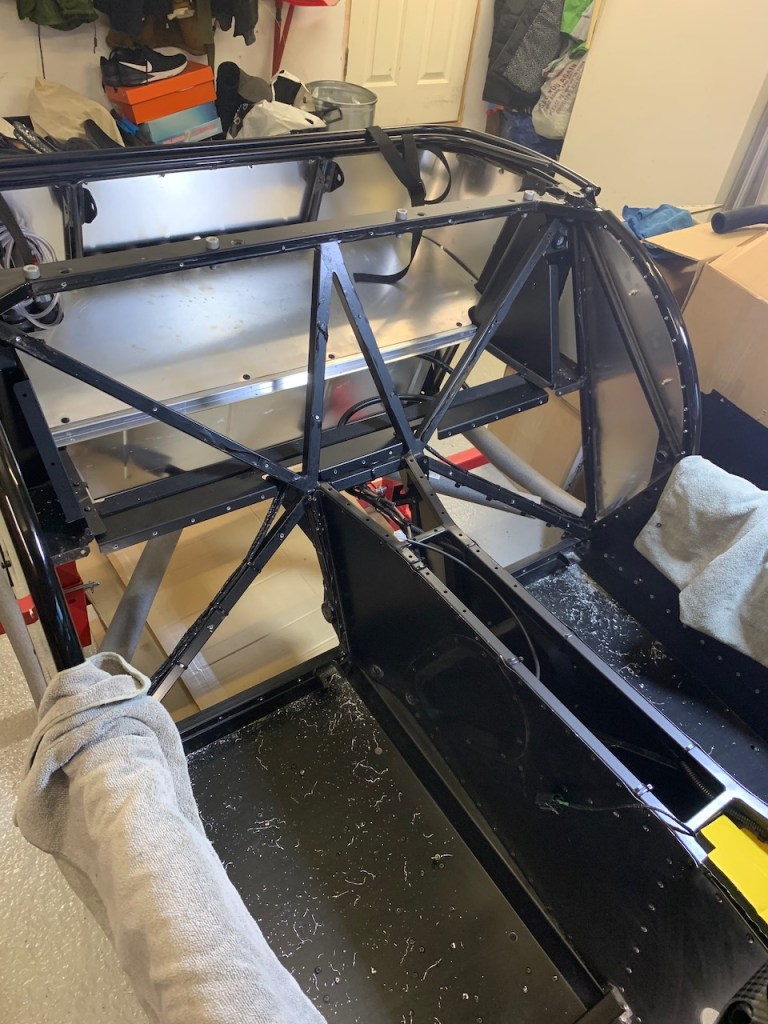
The rear panel was the trickiest as the two bow tube panels have to be removed first along with 3 rivets in each of the outer chassis tubes. The rear panel is also held in by the tunnel panels and I had to bend the flanges on the tunnel panels slightly to get enough clearance.
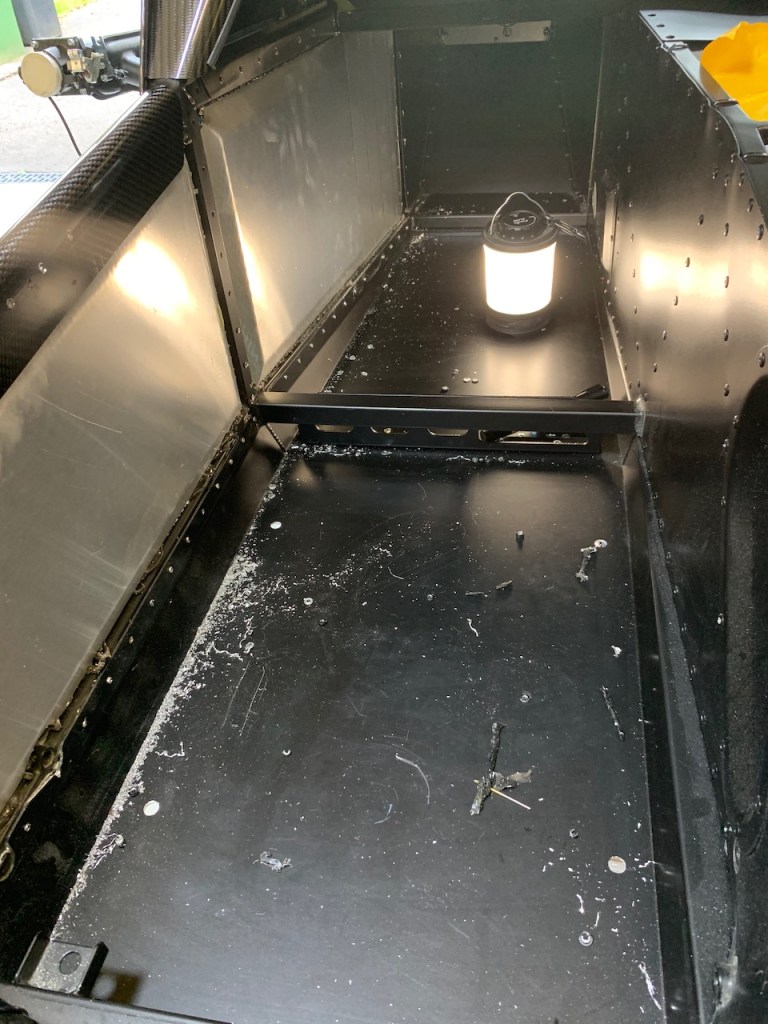
Once the panels were all removed I went round every hole with a pin punch to make sure all remnants of the old rivets were punched into the chassis tubes. More drilling and hammering was necessary at this stage particularly where the rivet mandrel had snapped off flush with the rivet dome.
The final job was to spray cavity wax into each hole, this serves two purposes, the first is to protect the inner chassis walls from corrosion and the second is to stick all the remains of the rivets together so they do not rattle around.
I also removed the plywood boot floor during this process and decided that a few coats of varnish would do no harm especially as the underside of the panel is somewhat exposed to the elements.
I will leave fitting the replacement panels until later in the build but the first major job is now done.
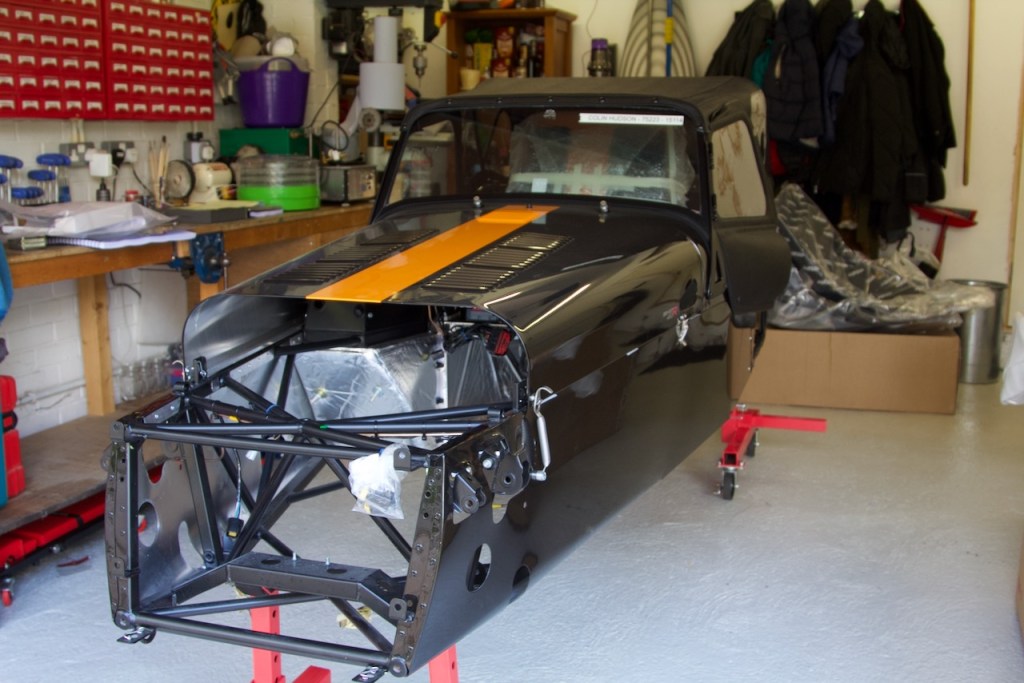
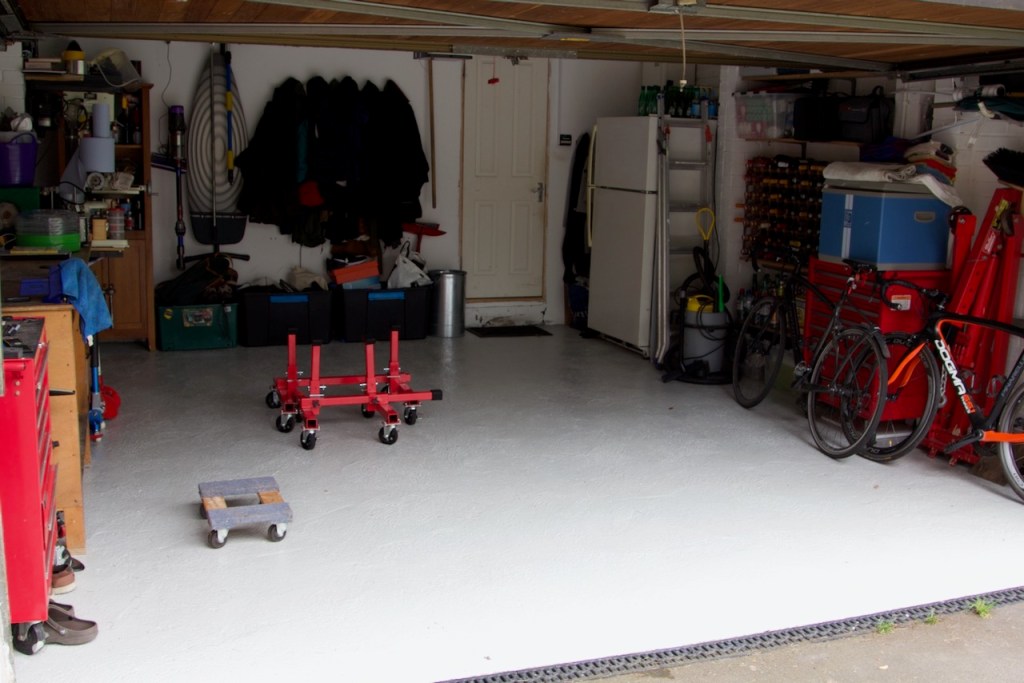
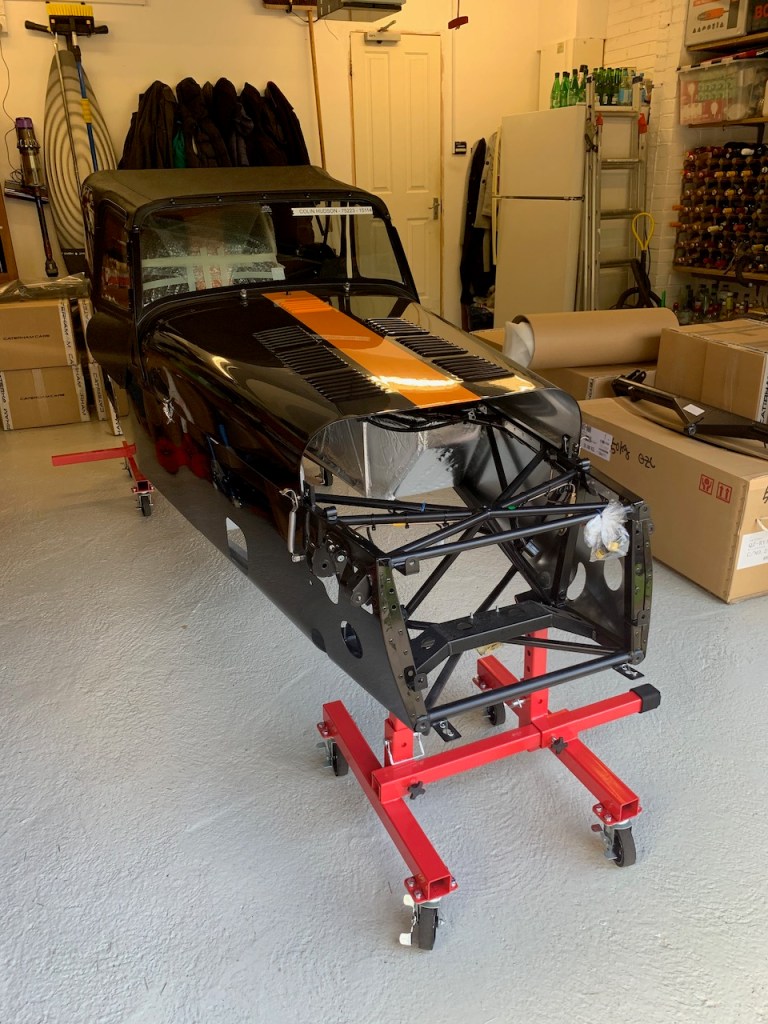
The kit arrived on time on Friday 13th March. Ivan the driver gave me a call mid-morning to say he was on his way and an hour later the Caterham van was reversing onto the drive.
With the help of my neighbour John, the three of us unloaded everything into the garage in about half an hour. The chassis and body shell definitely needs three people to lift it off the transportation trolley onto the mobile axle stands, but after that everything apart from the engine and gearbox can be moved by one person.
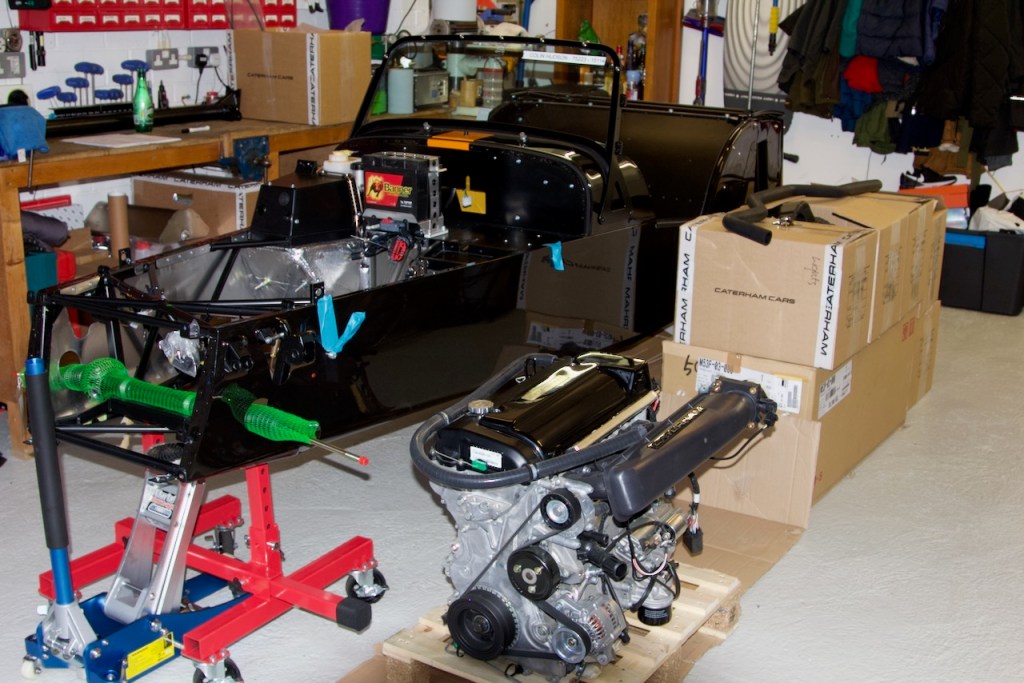
The engine comes on a pallet and is winched off the van and then man-handled into the garage.
I needed to get back to work so after thanking John and Ivan I closed up the garage and left the sorting out until the evening and the following day.
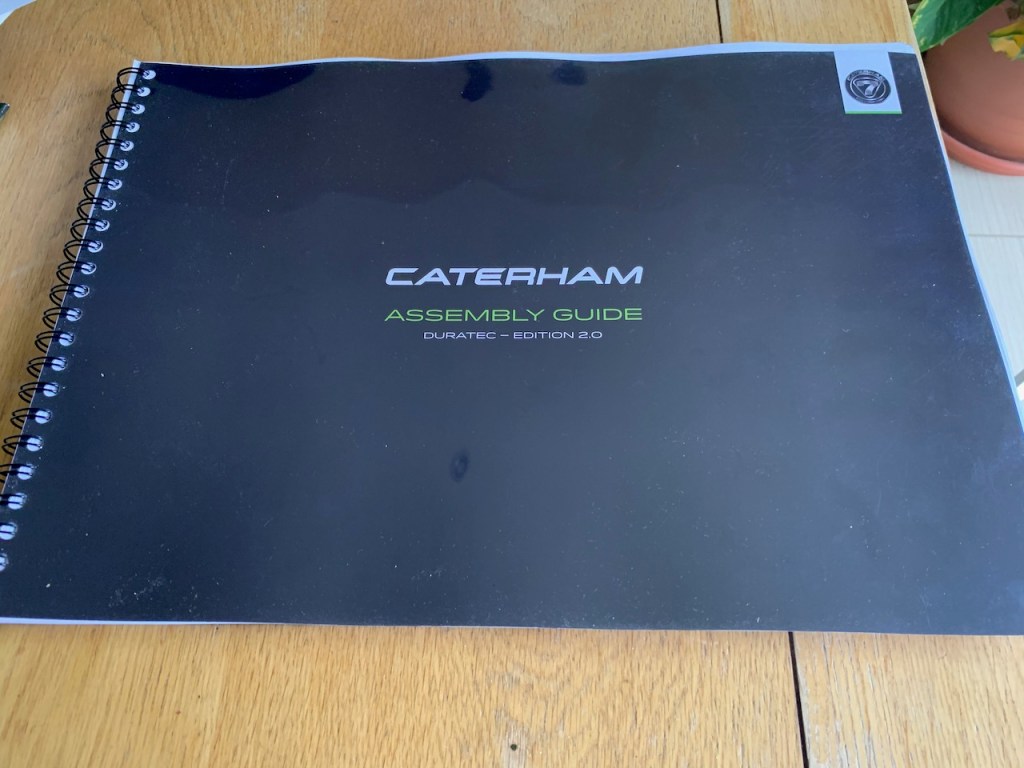
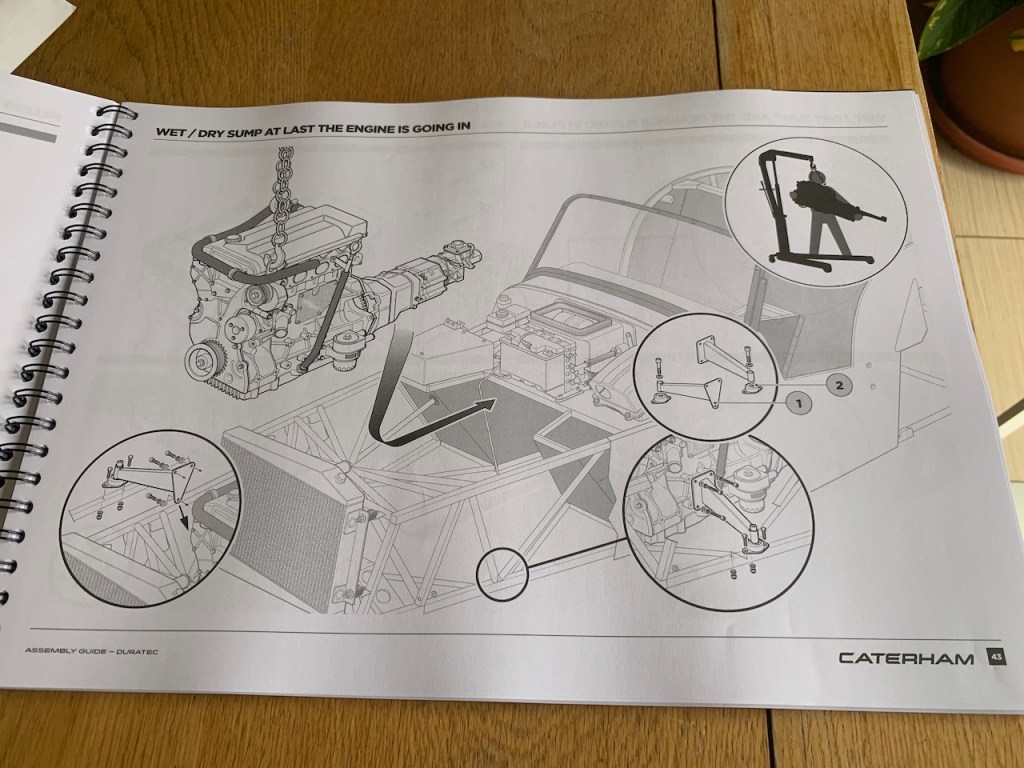
It is worth noting that the kit also comes with a new printed manual: ‘Assembly Guide – Duratec Version 2.0’ published February 2020. The initial read-through reveals more illustrations and attention to matters that other builders have noticed as lacking from the previous editions (e.g. how to connect the oil cooler pipes). The engine install picture makes this part of the build look deceptively simple…we’ll see!
I spent the following day sorting through the boxes, checking and organising all the parts. I decided to put all the fasteners and small packages in one box and to rationalise the others (e.g. suspension parts, lighting, hoses etc.) into their own boxes. Larger parts that will be required later such as the very nice carbon seats, nose-cone, bonnet, front-rear wings, exhaust etc. are all inside the house. Hopefully a little time spent now sorting into fewer boxes and adding some more labels will avoid a lot of frustration later in trying to find the obscure part or fastener.
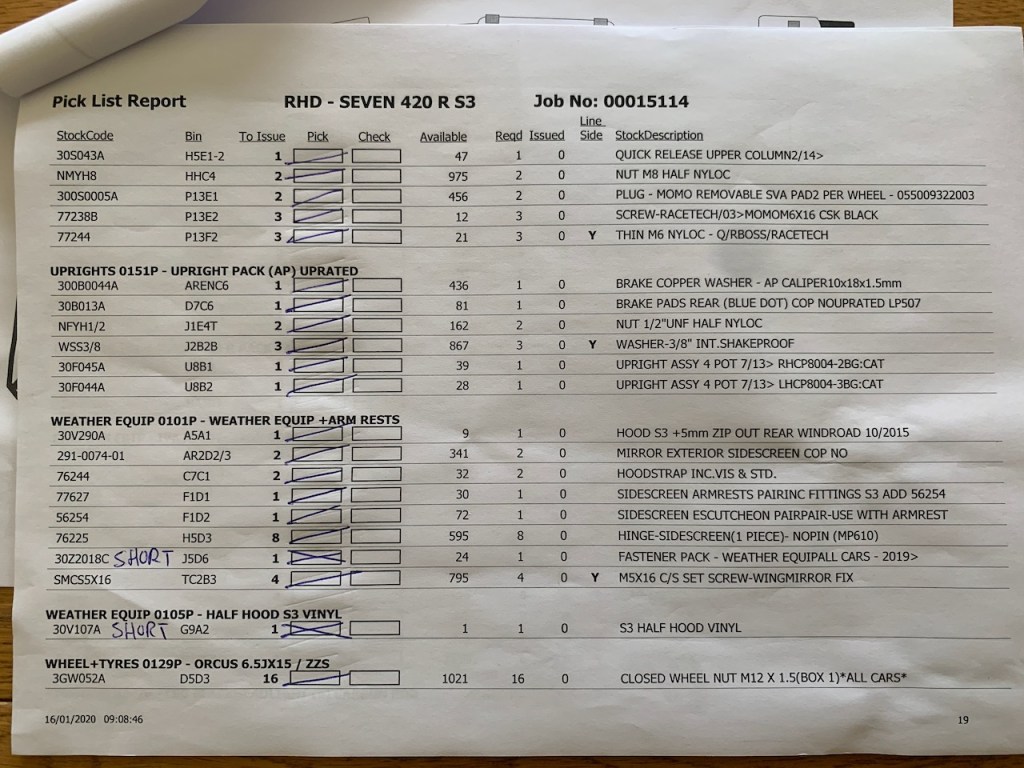
Having checked everything back to the pick list that is included with the delivery I am in fact missing three parts (‘shorts’ in Caterham speak).
5 speed gear lever (this is pretty important)
Half-hood (not essential for the build)
Weather-kit fastener pack (does not sound mission critical)
I’ve emailed Derek at Caterham to confirm that everything appears OK and to ask for an ETA on the missing items.
UPDATE: Email response from Derek: The weather fastener kit is no longer supplied as Caterham now fit them at the factory. The gear lever should have been packed in a small box with the engine mounts (I checked this and definitely no gear lever, there was however a packet of three screws labelled ‘gear lever’). Derek also asked me to check for the half hood as this should have been packed with the nose cone and rear wings (no it wasn’t).
UPDATE: Derek agreed to send the parts out as soon as they become available but has no idea of when this will be given the Coronavirus lockdown.
I am also still waiting for the Quantum shock absorbers I ordered. These are due in the next couple of weeks.
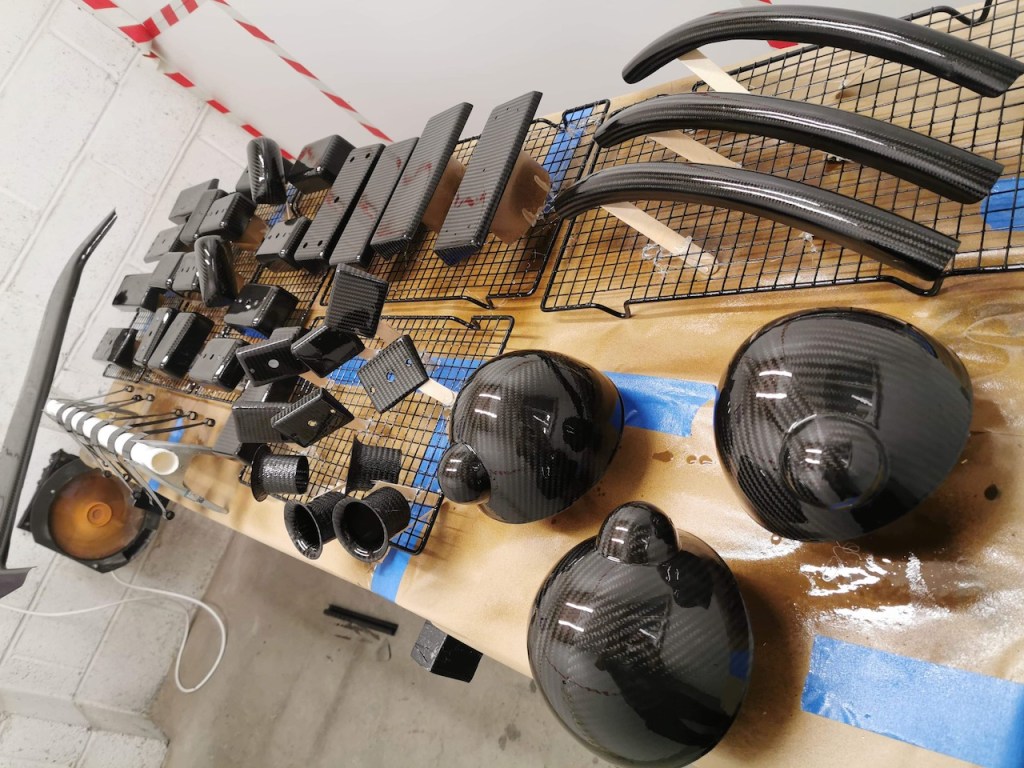
I ordered a number of parts from David at Classic Carbon who has kept in touch during the last few weeks and has been kind enough to send progress pictures. His parts are all hand built with great attention to detail using pre-preg carbon and then hand finished. The headlight bowls have been prioritised and in the final stages of clear coating. I’m looking forward to posting some pictures of my own when they arrive, from what I have seen so far they look amazing.
The next job is to reduce the height of the axle stands by one notch whilst we can still man-handle the chassis as it just a fraction too high for my trolley jacks. Doing this now will still leave a nice working height and make it easier for us to lower the car safely onto its wheels when the time comes.
After protecting the chassis with the obligatory pipe lagging and masking tape I will then tackle the job of removing the interior panels (not a standard part of the build but necessary in order to fit the carbon panels that arrived a couple of weeks ago).
The build may end up progressing faster than originally planned due to the COVID-19 outbreak. My eldest daughter Sophia is cutting short her post-graduation Asia tour by a couple of weeks and our own family holiday in France may turn into a 420R build ‘staycation’.
The carbon panels arrived safely and look great. The plan is to remove the aluminium panels early in the build process but not fit the rear panel and bow tube panels until the differential and rear end parts are installed. I figure this approach will give us better access and visibility during this part of the build.
The carbon panels I ordered a few weeks ago have arrived at Caterham and should be delivered on 17th February whilst I’m in India with work. Exciting as these will be the first parts of the car to arrive.
I gave the garage floor its final coat of paint last week and now that it is all dry I was able to reconnect the air compressor and airline as we will be needing to use the air rivet gun to fit them (Daniel French noted that 230+ rivets are required to fit these panels – and of course we have the same number to drill out in order to remove the standard ones).
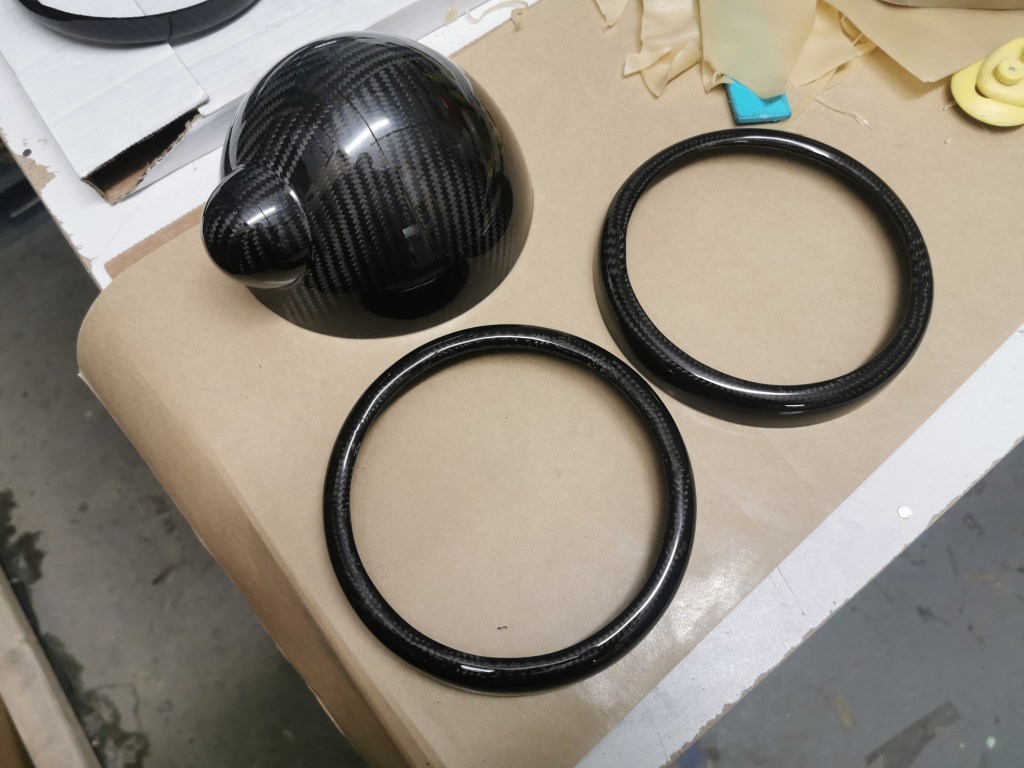
The carbon-fibre headlight bowls with the gloss clear-coat finish have been on order for a few weeks now along with a few other bits and pieces. David and his team at Classic Carbon are working on them and I hope to receive the bowls at about the same time as kit delivery.
The plan is to remove the LED headlight inserts from the standard lights and bond them into the carbon-fibre headlight ring using Sikaflex 221. The carbon headlights will be installed during the main build instead of the standard items.
The other items (bow-tube protectors, coil-cover, light blocks) will be fitted toward the end of the build or after IVA so not as time critical as the lights, but I like to have everything to hand.
UPDATE: 8th February: Just received an email from David at Classic Carbon with an update on progress. The coil cover is complete and the other parts are in the process of having clear-coat applied.
UPDATE#2: 10th April: No parts have arrived yet although David is ‘hopeful’ of getting some parts out.
UPDATE #3: 25th April: Been in touch with David several times this week and now that the disruption from the Coronavirus lockdown has settled down he has made progress in finishing the parts. The bow tube protectors have been posted via Royal Mail and should arrive any day. The headlights are have also just been finished and will be posted today. The remaining parts are finished and we are just waiting for some neoprene gaskets before they can be shipped too. The bow tube protectors and headlights are the priority items and I am glad that David has got these out.
The Quantum Two-Zero digressive dampers and Hypercoil springs have been ordered from Simon at Meteor Motorsports. Delivery should be about 5-6 weeks which will hopefully coincide nicely with the arrival of the Seven kit itself.
UPDATE: Quantum dampers and Hypercoil springs arrived the week after delivery so all was OK for starting the build
When I paid the initial deposit I was given build week 4, 2020 as the date on which my Seven would go into production and true to form on 21st January I received an email from Euan at Caterham confirming exactly this.
Based on the standard 8 week build time this means the delivery window could open up from 16th March.
However, Euan went on to say that Caterham are currently running ahead of schedule raising the possibility of a slightly earlier delivery (maybe from the week before ? – 9th March onwards…we’ll see how things go).